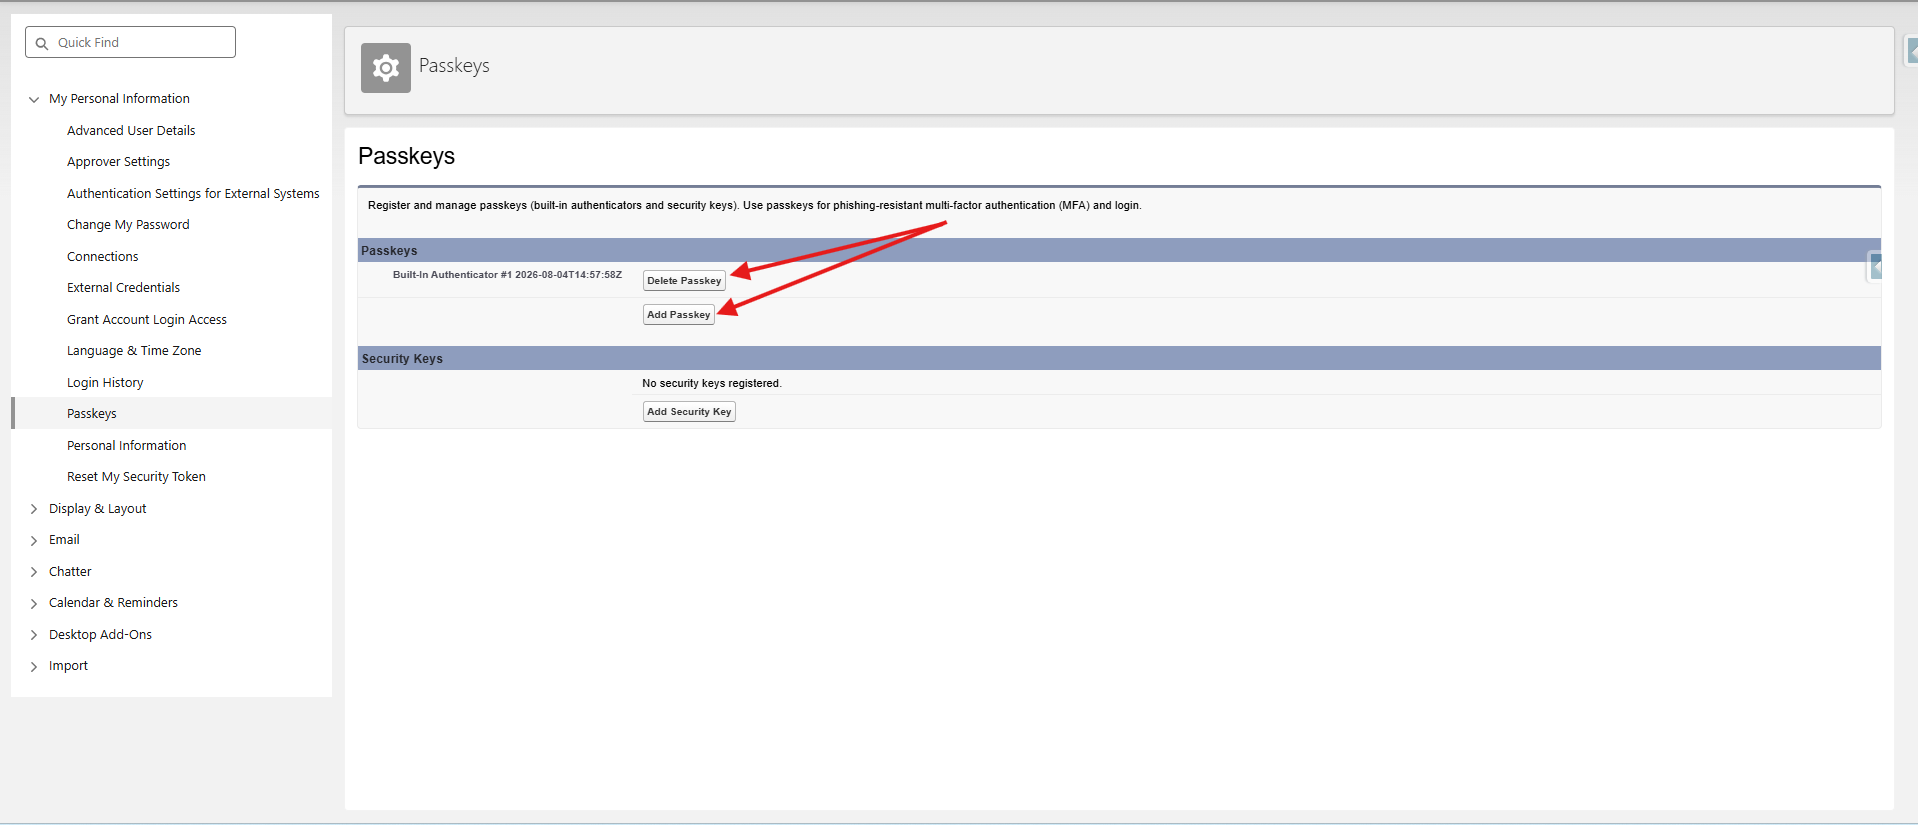
There will be cases where you or another User may have already added a passkey, but a new passkey may need to be added. These may be that you set it up through Windows Hello and got a new laptop or use multiple devices, or you connected it to your password vault and connected it to the wrong account.
Below, we will walk through the steps to connect a new passkey or security key to your login. Depending on if you, or the affected User, are able to login to Elements, this will determine what steps you will take.
You Can Login But Need to Connect a New Passkey or Security Key
If you are able to login to Elements, but need to connect a new passkey or security key so that you can authenticate through another method, then you'll follow these steps. As an example, if you're able to login through your browser but need to connect a new key for the Outlook Integration (Salesforce Plugin for Outlook), you'd login through your browser first and connect a new key through the instructions below.
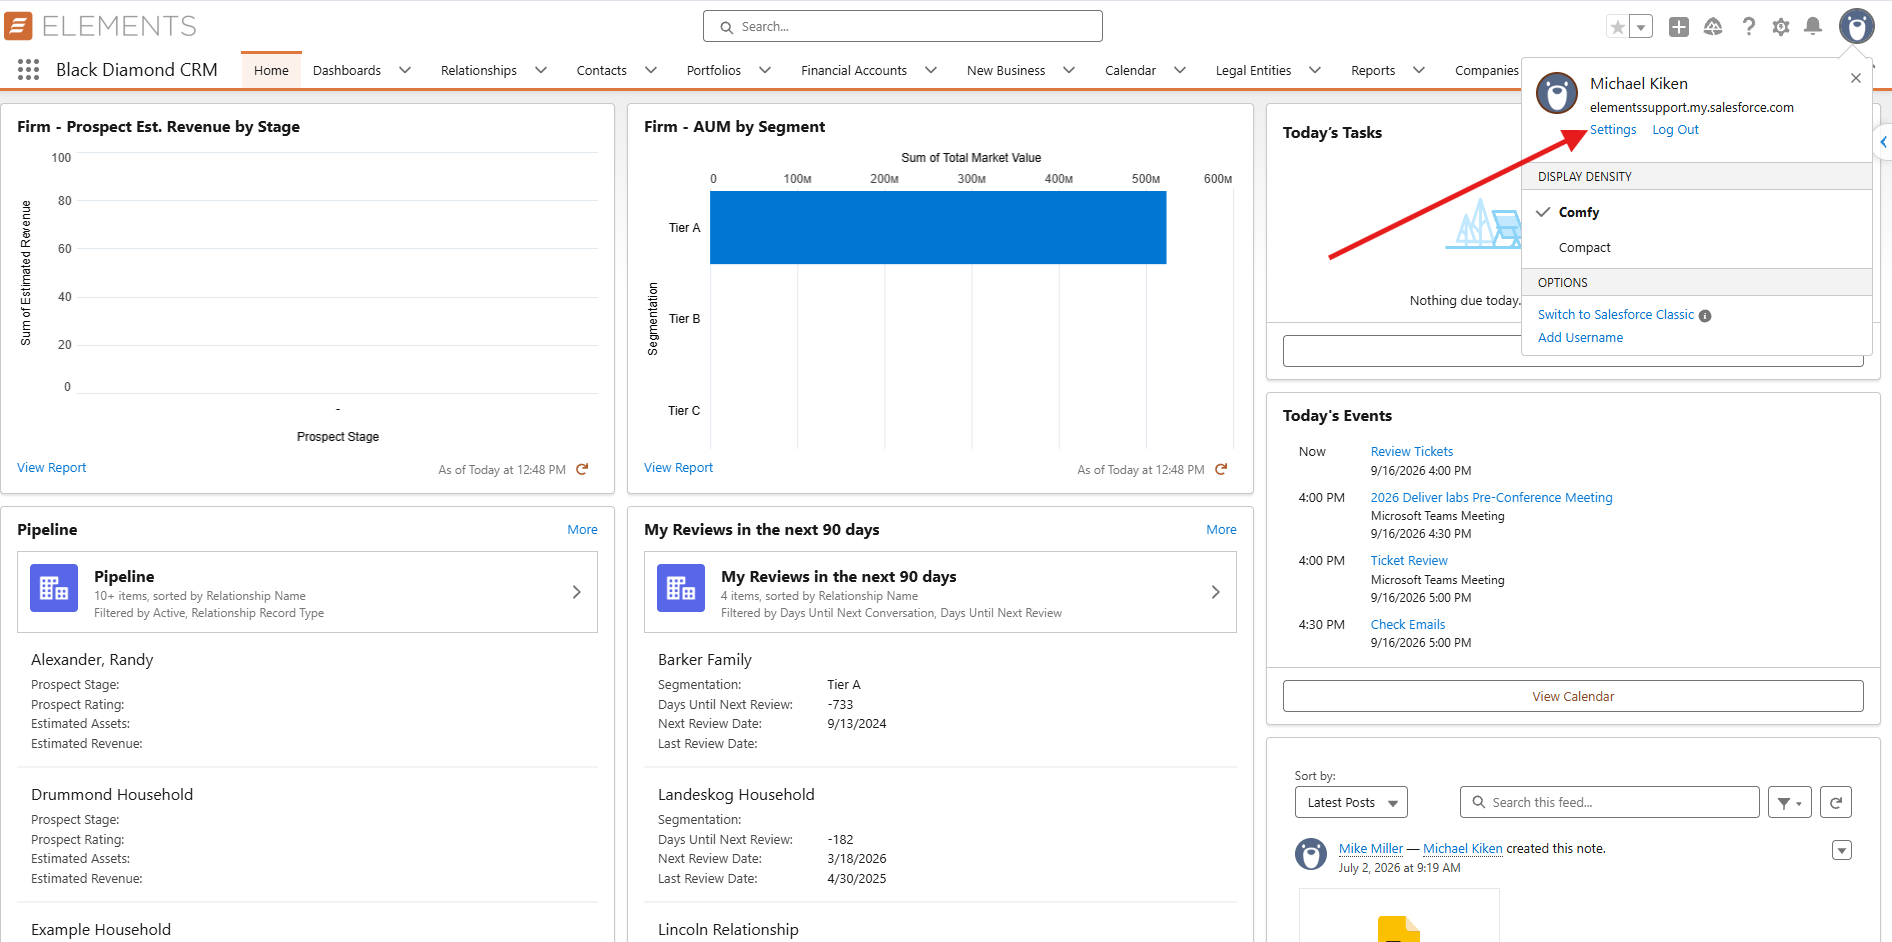
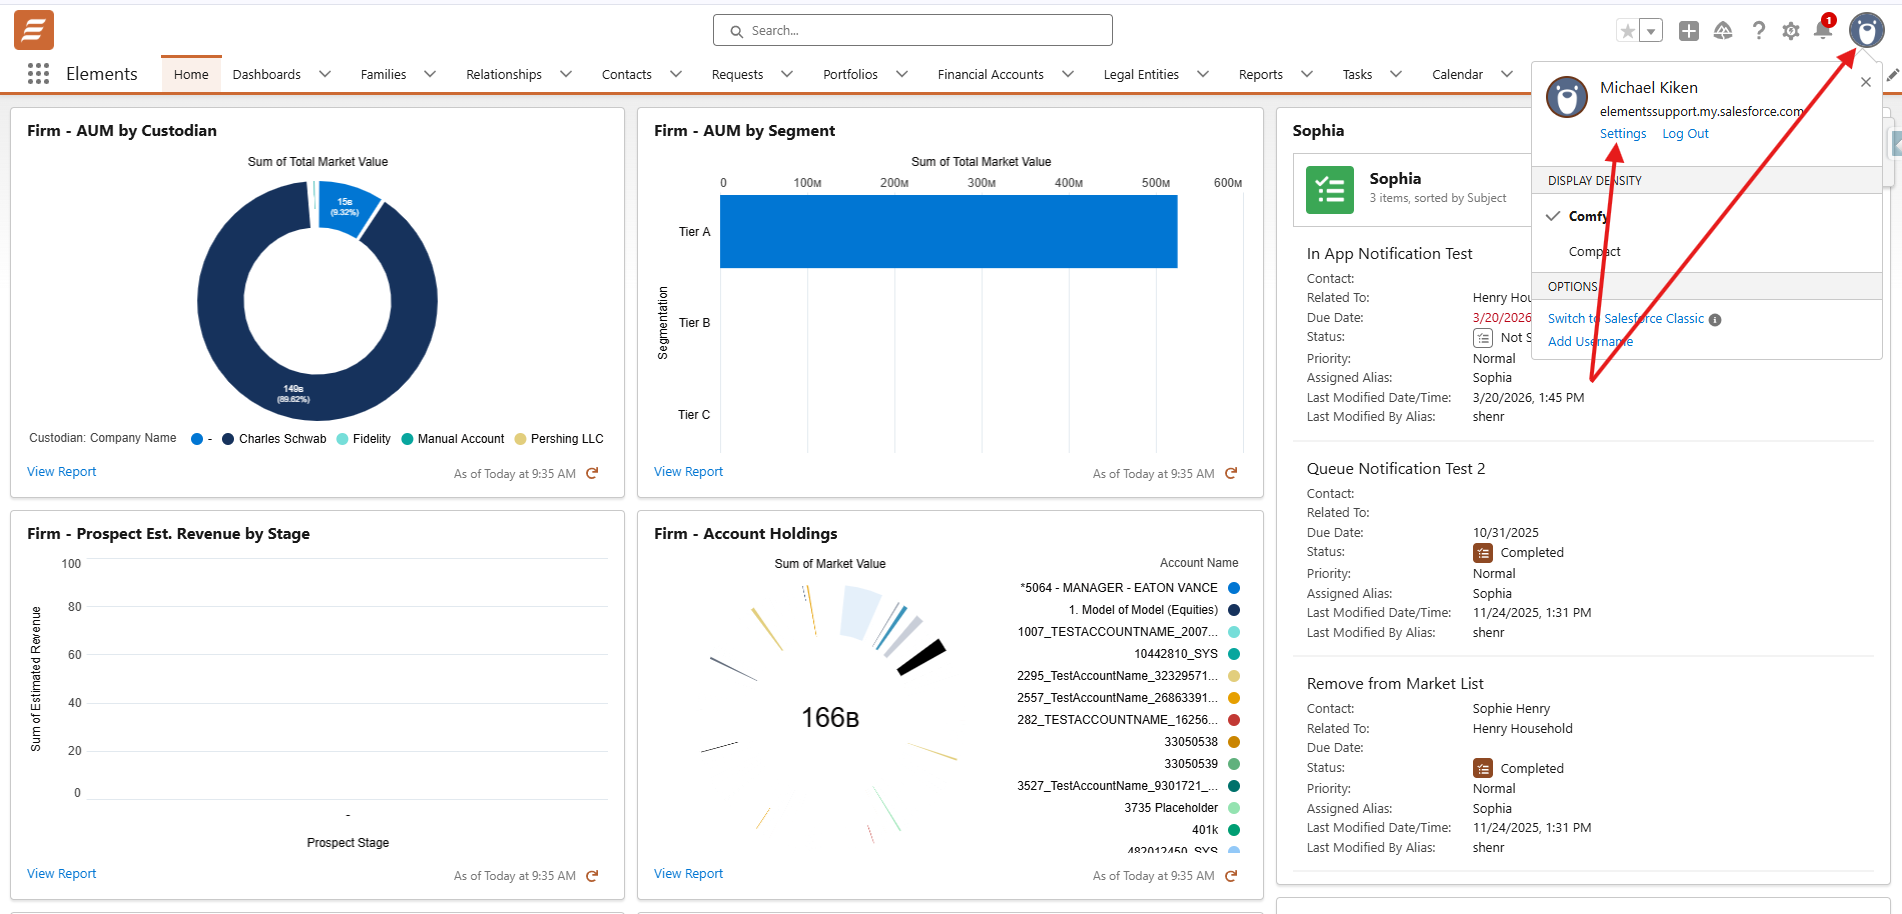
1. Once logged into Elements, you would click on your Avatar or picture in the top right-hand corner and then click Settings
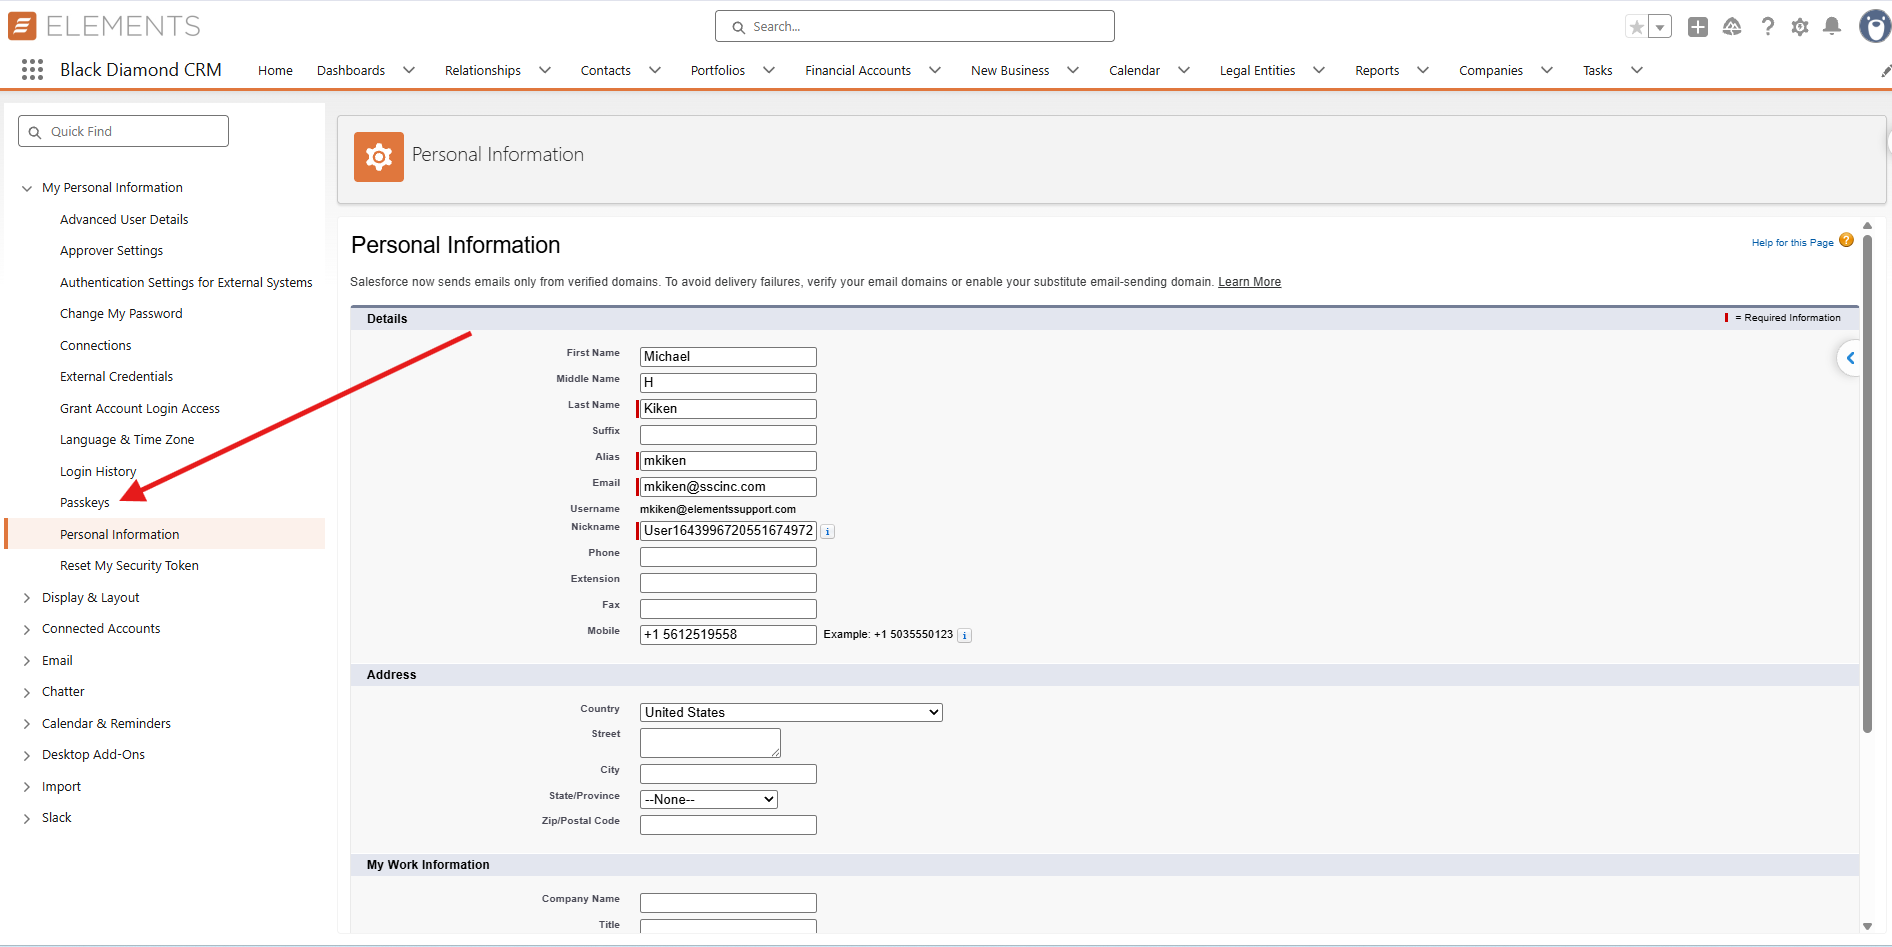
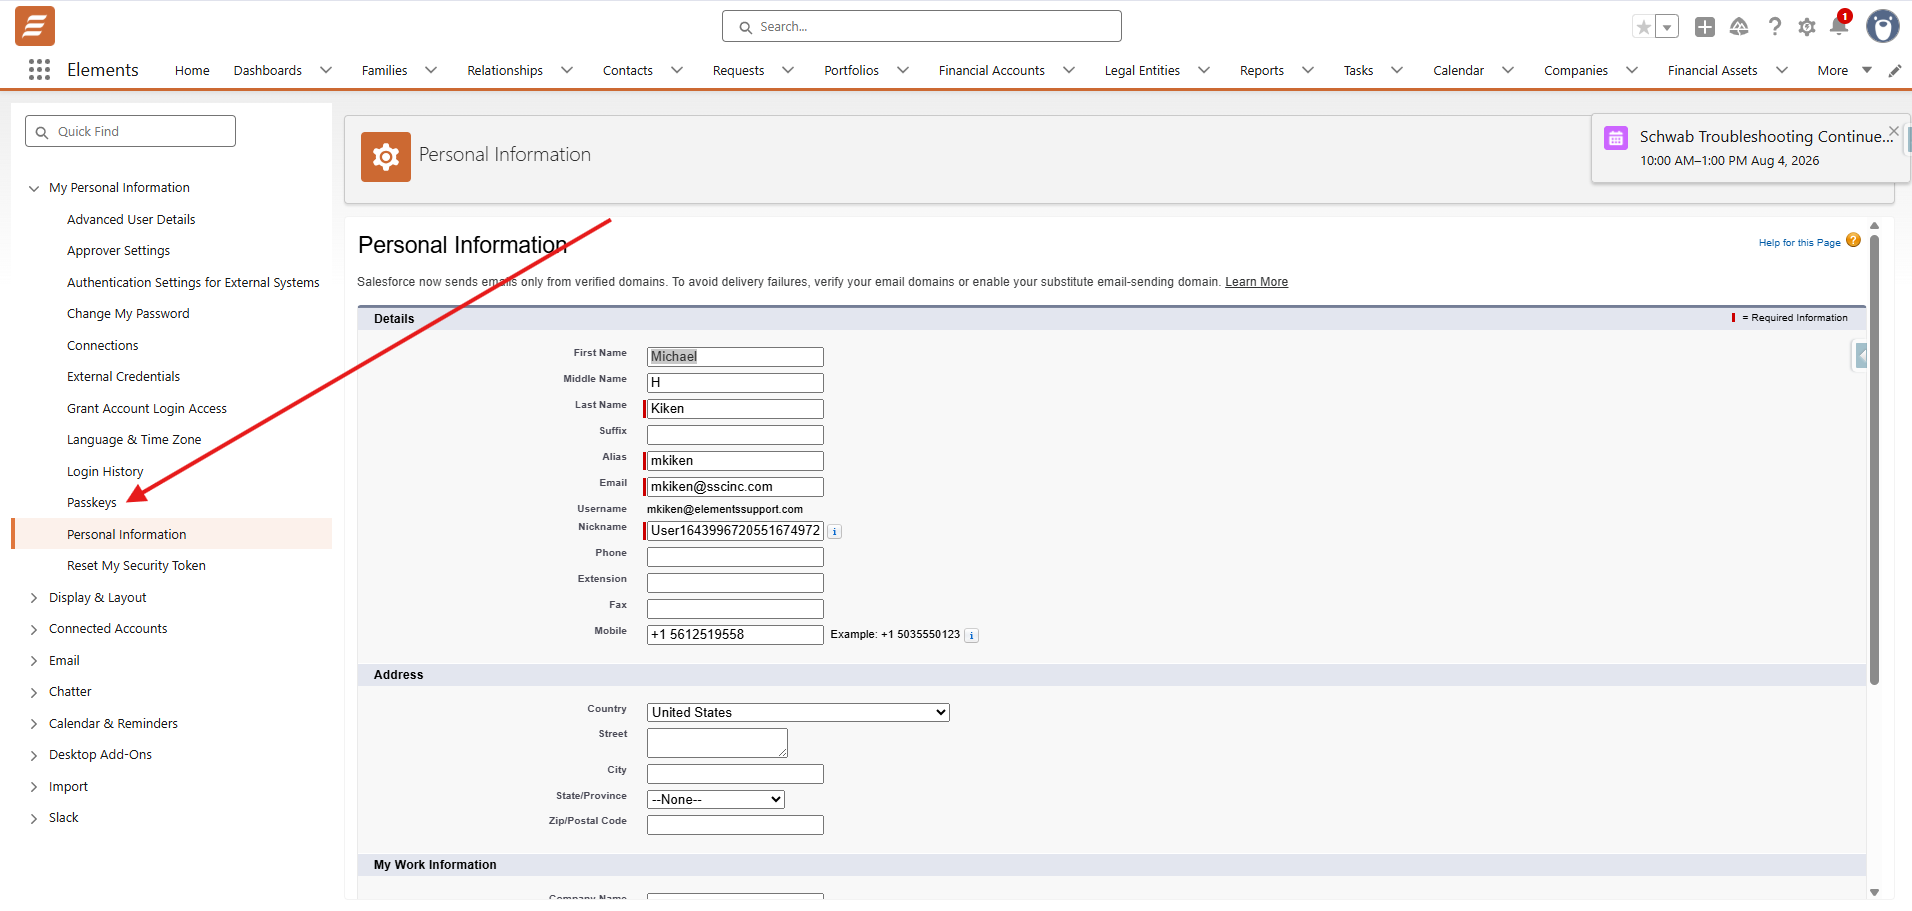
2. After clicking into Settings, you'll click on Passkeys on the left-hand side.
3. From there, you'll click Add Passkey to add a new passkey.
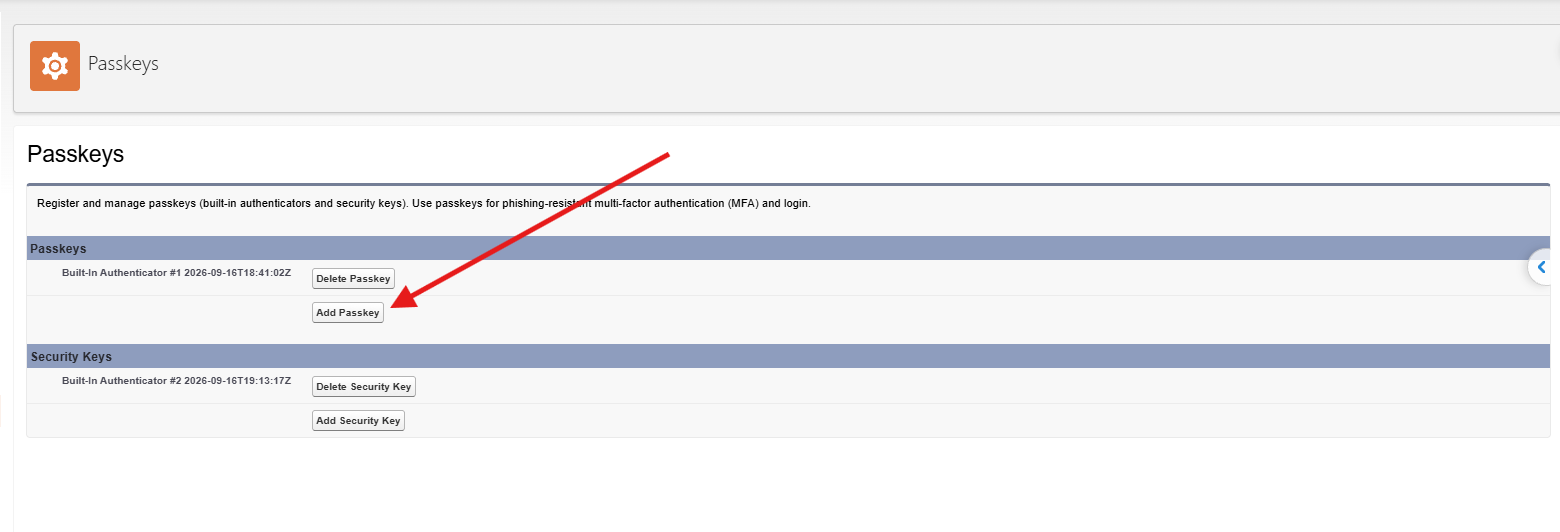
4. From there, you will be prompted to authenticate through your existing authentication method and add a new one.
You Can't Login With Your Existing Passkey
You or another Admin would follow these steps to enable the affected User to login and be able to connect a new passkey.
Send a Temporary Verification Code
If a User is unable to use the authentication method that is connected for Multi-Factor Authentication, an Admin can generate a Temporary Verification Code. This would be most useful when a User is unable to access the verification method that they typically use to authenticate. The Temporary Verification Code is limited in that it is only valid for 1 to 24 hours and the verification code may be used as many times as needed until it expires.
1. Navigate to Setup via the gear icon.
2. In the Quick Find box, search for Users.
3. Click on the user's name that needs a Temporary Verification Code to be generated.

4. Click on [Generate] next to Temporary Verification Code (Expires in 1 to 24 hours).

5. This will take you to a page where you will choose how long you want the Temporary Verification Code to be available before it expires. Click Generate Code to generate the code for the User.

6. After it is generated, a new page will be visible with the Username of the User who the code was generated for, the Temporary Code, and when it expires (Date & Time).
NOTE: The User will not receive the code via email so you need to share the code with them directly.

7. As long as the Temporary Verification Code is not expired, the User will be prompted with the following when they try to log in instead of the authentication prompt that they normally receive. On this screen, they will enter the verification code that was generated.

Add a Passkey or Built-In Authenticator through Personal Settings
Once the User is able to get logged in with the Temporary Passcode, they will follow these steps to add new passkey. NOTE: Users are able to have multiple passkeys or built-in authenticators so they don't need to delete any of their existing ones unless it is no longer applicable for them.
1. Go to their Personal Settings by clicking their avatar in the top right-hand corner and clicking Settings
2. Once in their Personal Settings, they click on Passkeys on the left-hand side.
3. On the Passkeys page, you'll see the already connected authentication methods and when they were registered. If you need to delete an existing passkey, you'll click Delete Passkey. However, if you need to add a new passkey or built-in authenticator because you're using multiple devices, you'd just click Add Passkey and this will prompt you through the passkey registration process. You can use this article as a reference for how to connect a new passkey if you haven't done this before.