


Salesforce is now requiring phishing-resistant MFA for Administrators and other Users with privileged access. Privileged access is defined as having View All Access, Modify All Access, Author Apex, and Customize Application.
As this gets rolled out, there are multiple ways to configure passkeys and security keys to satisfy this new requirement. We're including instructions for how to authenticate through a mobile passkey and password vault.
NOTE: If you already have a passkey or security added to your account and you're trying to setup a new one, please follow the steps in this article.
Available Passkey or Security Key Methods
Passkeys Through Password Vaults
Pros:
- If you already have a password vault that you use, passkeys should be enabled or available to be turned on for your firm
- They are connected to a browser extension instead of your computer so they can be used across devices as long as you have access to the password vault through a browser extension
Cons:
- These types of passkeys can't be used for login sessions that aren't connected to a browser such as through the Outlook Integration. As a result, you'd need to add a second passkey.
Passkeys Through a Mobile Device or Authenticator App
Pros:
- If you already use a mobile device or authenticator app to authenticate then this will enable you to continue to use it through a different method
- Device and browser agnostic so you're not restricted
Cons:
- If you get a new phone then you'll need to an Admin to help login so you can set a new passkey method
Passkeys Through Windows Hello
Pros:
- If you have a Microsoft computer and Windows Hello is enabled then you can use this to authenticate you on that device
- Secure method that is either through a retinal scan, PIN, or fingerprint
Cons:
- These are tied to the specific device so if you switch devices or have multiple computers that you use, then you won't be able to authenticate on the second device and will need another Admin to help login so you can set a new passkey
Security Key Through U2F Key
Pros:
- Can be used across devices and some U2F keys have different USB types including for both computer and mobile devices
Cons:
- These have an additional cost associated with them. As a result, they're primarily used if the other methods are not available
Passkeys Through Password Vaults
If you already have a password vault then it should support passkeys. Examples of password vaults that we see clients use include LastPass, BitWarden, and Keeper. Most, if not all, password vaults support passkeys as well.
NOTE: This method will only work for logins through a web browser and will not work for the Salesforce Plugin for Outlook. If you setup a passkey through this method then you may need to setup a second passkey through one of the other methods listed below.
Below is a guide on how to setup passkeys with a password vault. In this example, this will be with Zoho Vault, which is the password vault that we use internally.
1. When logging in, you will be prompted for a passkey. The screen will look something like this.
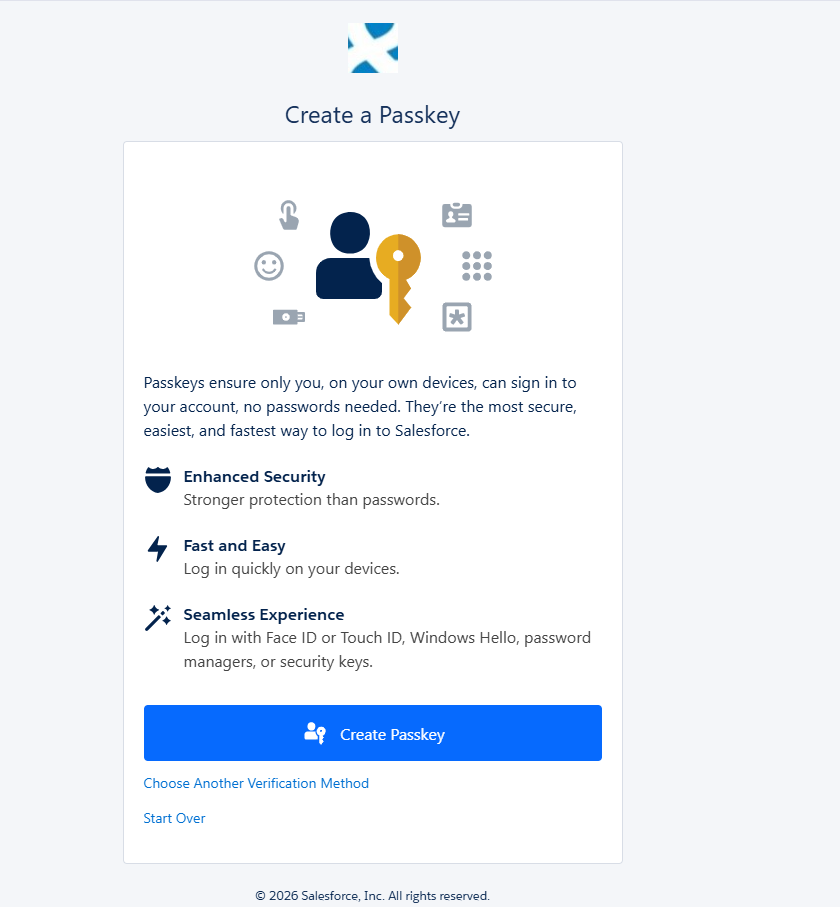
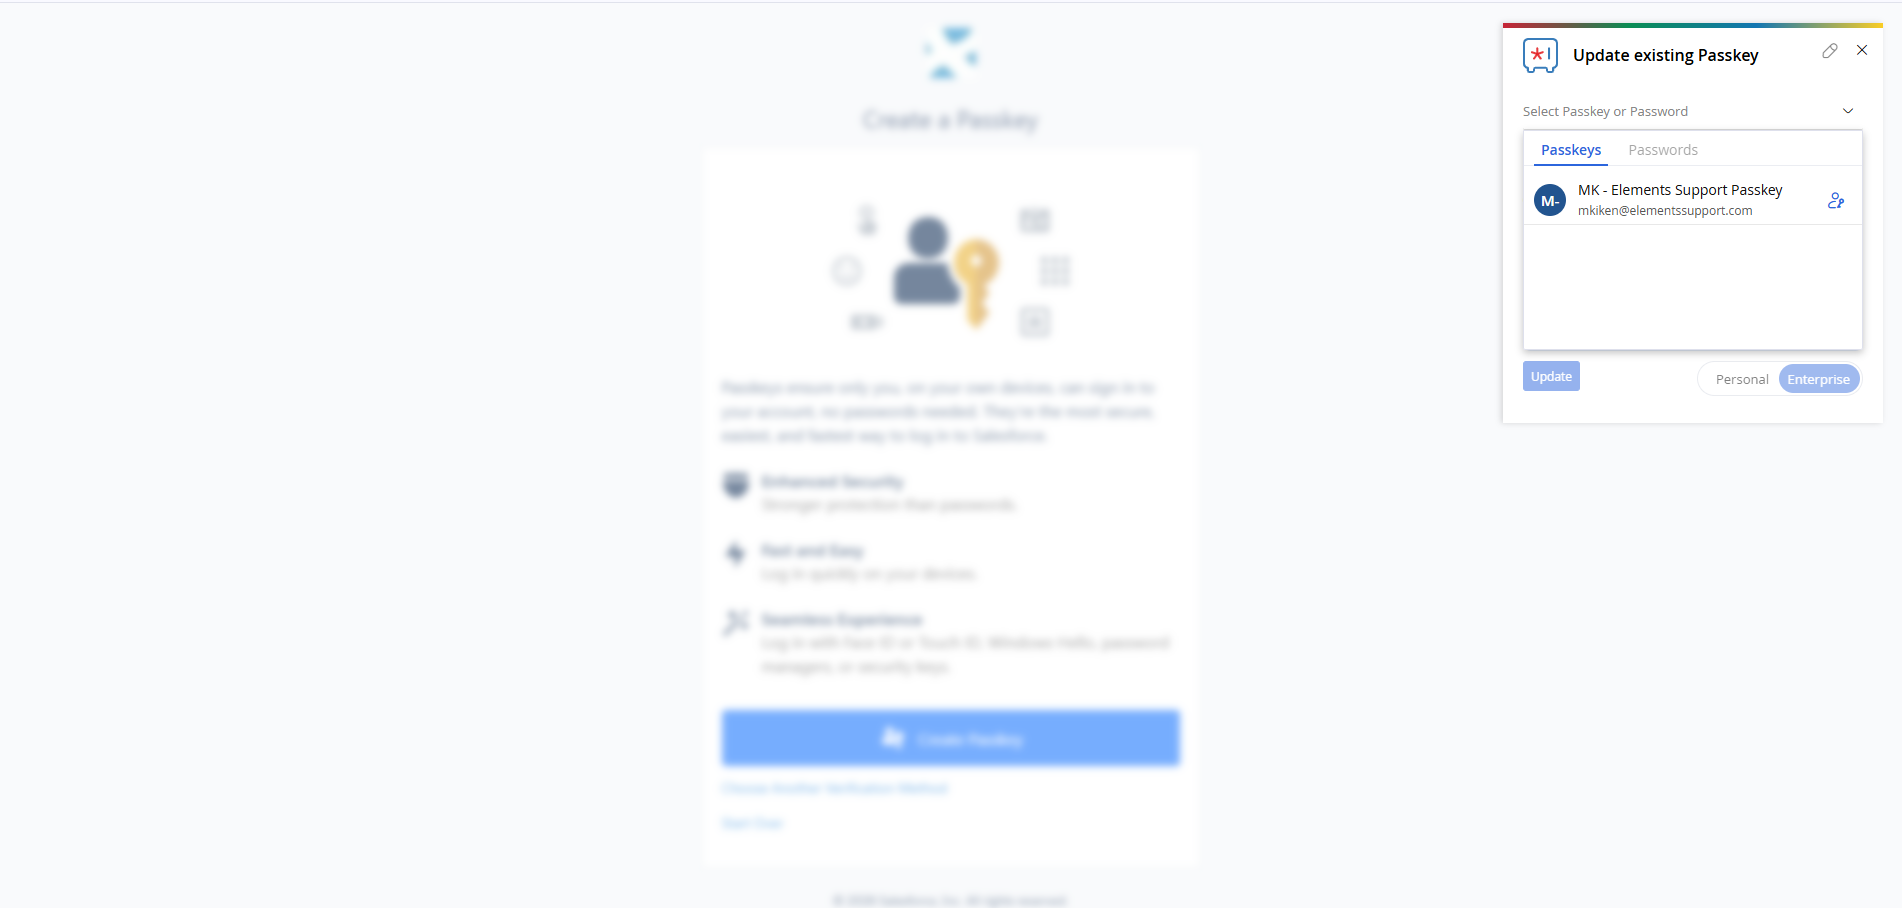
2. You'll click Create Passkey. If you have a Password Vault, make sure to add the browser extension for it first. You can add this through the AppStore for your given browser whether that be Edge or Chrome. In my example, I'm using Zoho Vault. After I click Create Passkey, you'll see that a popup will appear on the side prompting me to add a passkey through it.
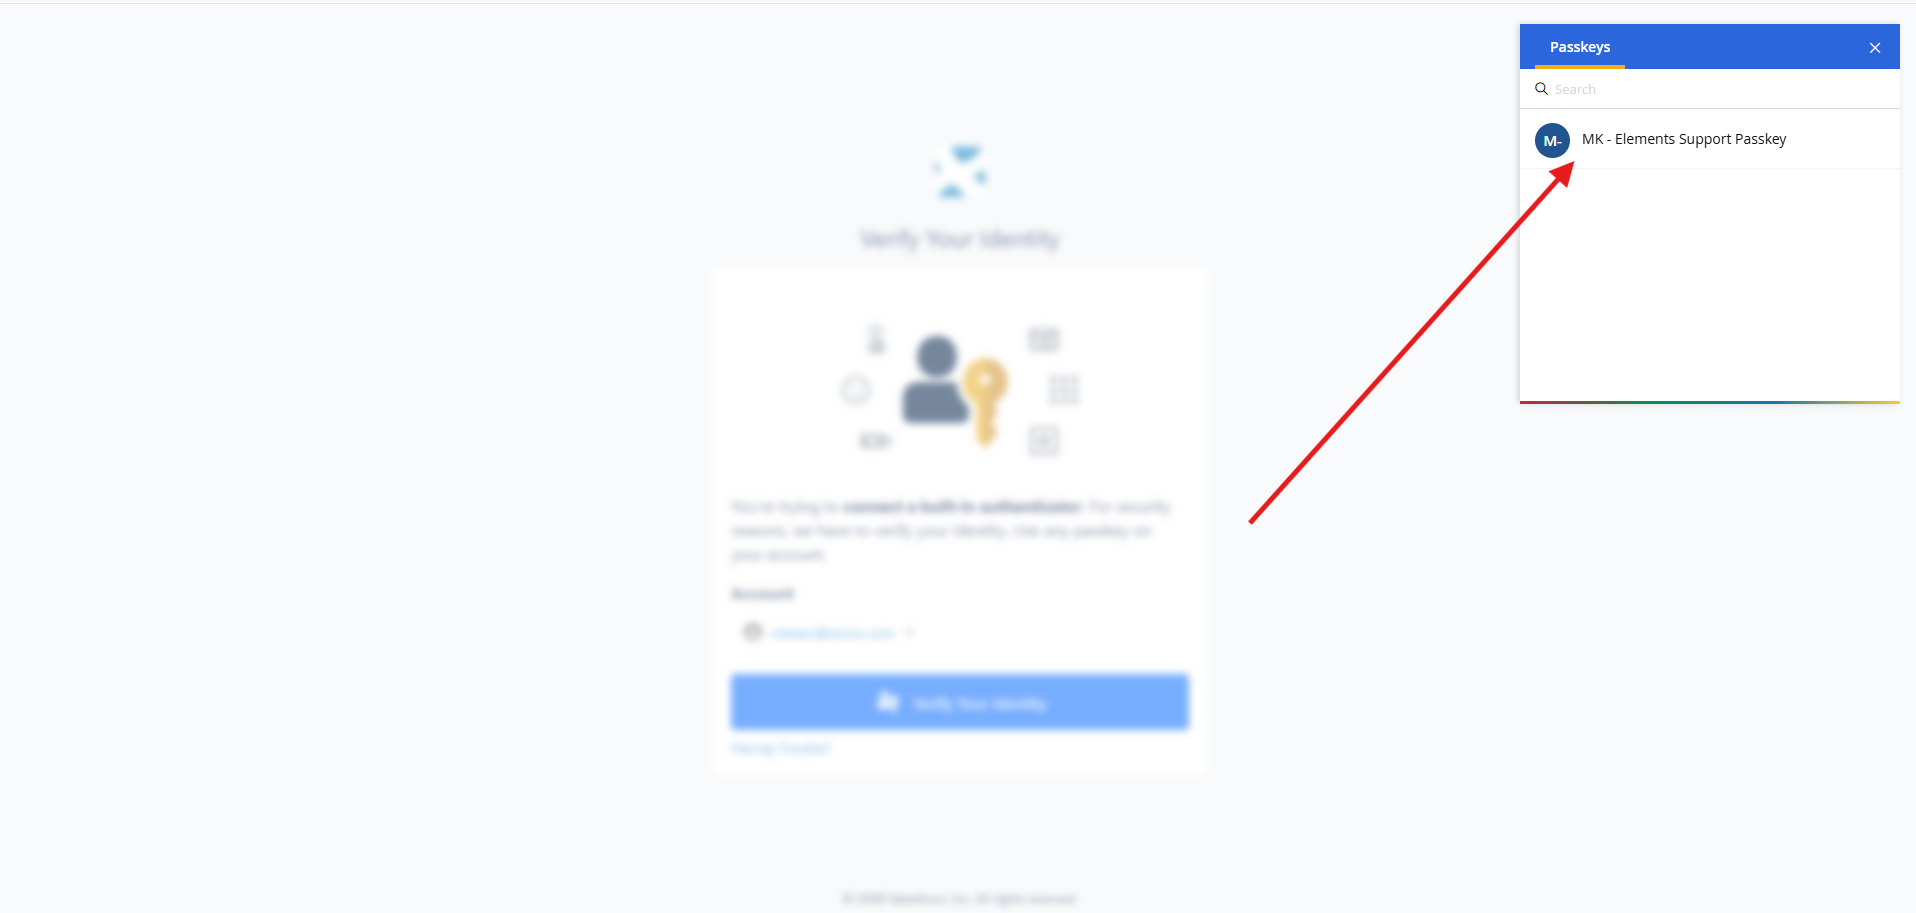
3. After you add the Passkey to your vault, you may be prompted to authenticate using that passkey. If you are, a popup will appear with that passkey prompting you to use it to authenticate.
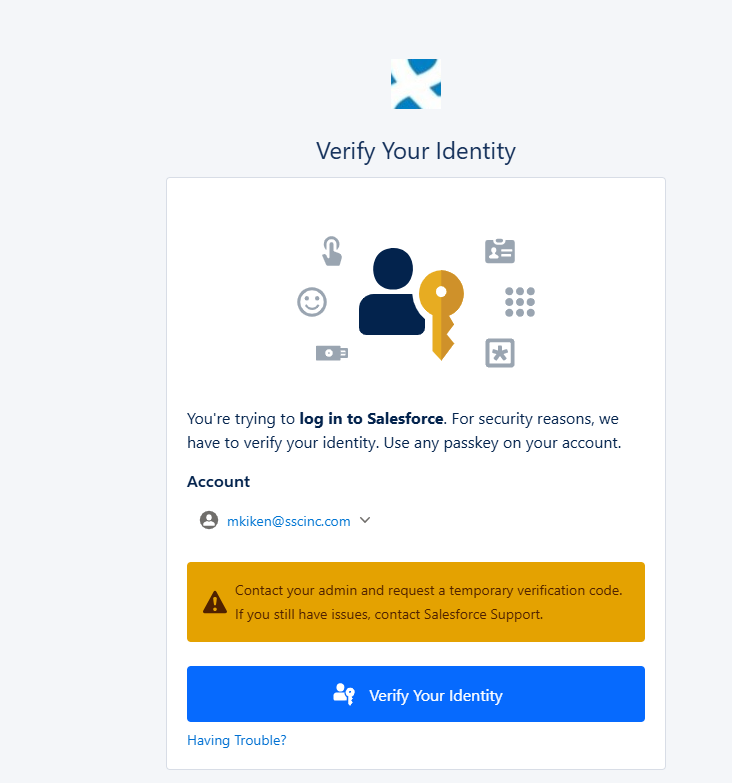
Moving forward, when you login, you'll be prompted to Verify Your Identity with this new passkey similar to the screenshot below.
Passkeys Through an Authenticator App or Mobile Passkey
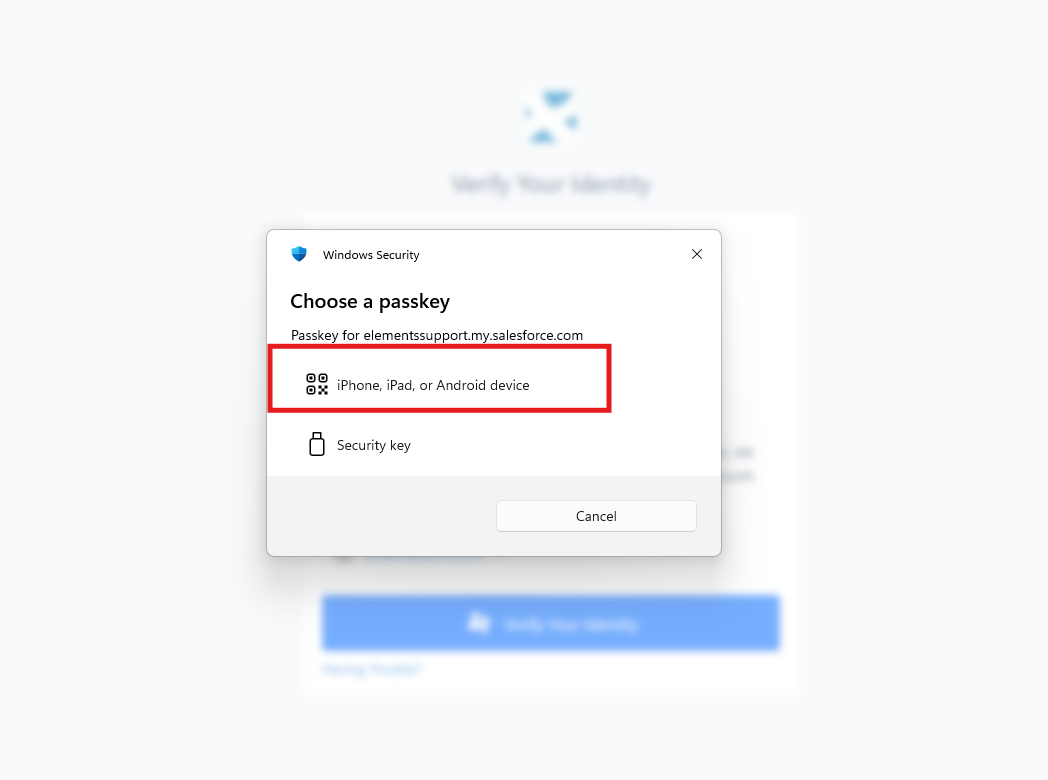
1. When logging in, you will see the following popup message. You'll choose "iPhone, iPad, or Android device"
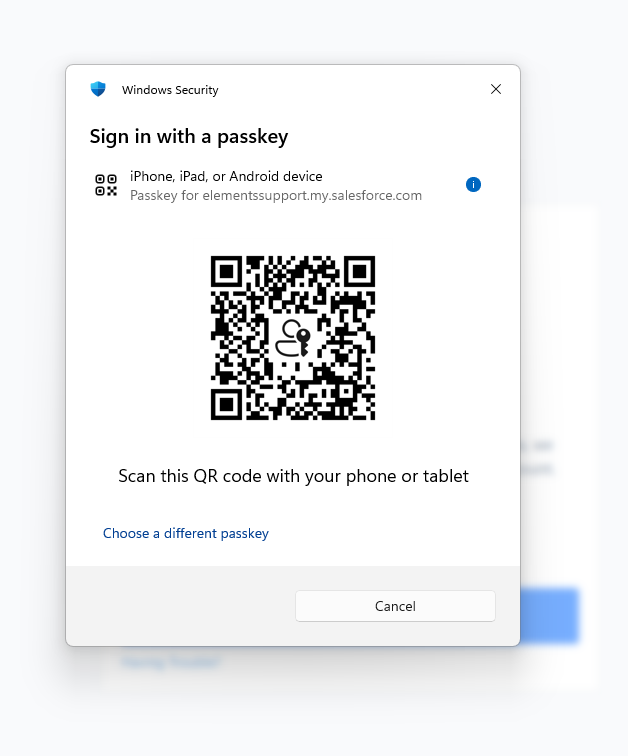
2. After choosing this, you will be presented with a QR code similar to the one below. You will scan this with the QR code prompt in your authenticator app that you'd like to store the new passkey on or if you'd prefer to store it through your phone's passkey manager then scan the QR code with your phone's camera.
3. You will need to select to authenticate through this same method when logging in moving forward.

